Pages

Showing posts with label cooking tips. Show all posts

December 30, 2014

Easy Eggs Bennedict - Budget Cooking

2014-05-11 11.45.46
 
It's possible! You may find you like it so much that going out for breakfast at a restaurant is not as appealing anymore because you can make this meal in about 15 minutes and you save yourself a few dollars too!

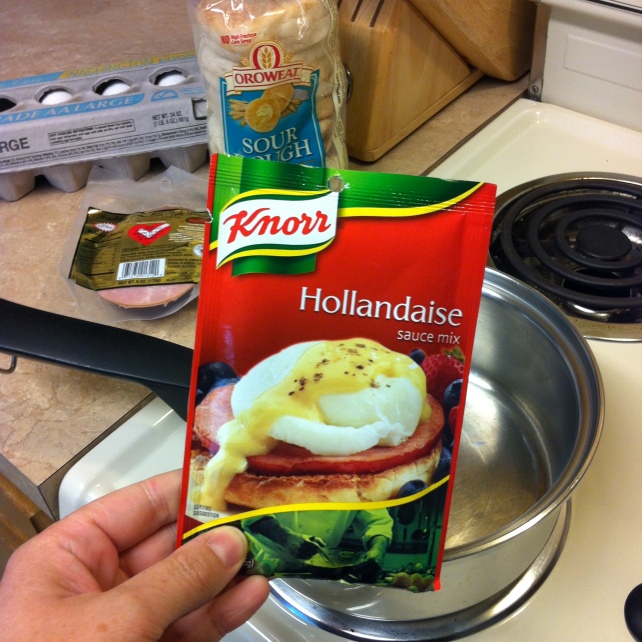
I have tried making my own hollandaise sauce, however it's much more time consuming. I came across a seasoning sauce mix packet made by Knorr. I'll be honest I was not sure if I would like it. It's not bad! However it needed to be made more tasty. Just a couple extra additives to this sauce makes a restaurant quality sauce!

2014-05-11 11.24.16
 
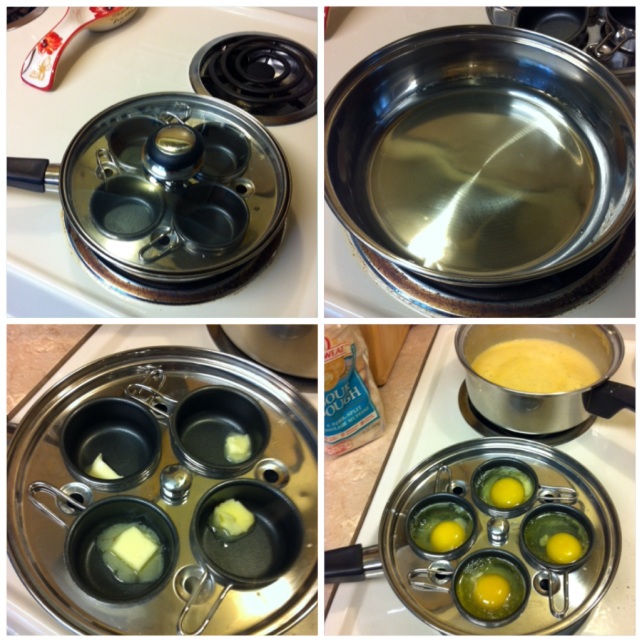
Poached eggs: I have a special pan that makes poaching eggs easy, however if you don't have this pan you can still make poached eggs. I was watching Brunch with Bobby Flay and he had some great tips on making pouched eggs, click on the link for video (see brunch with bobby flay).

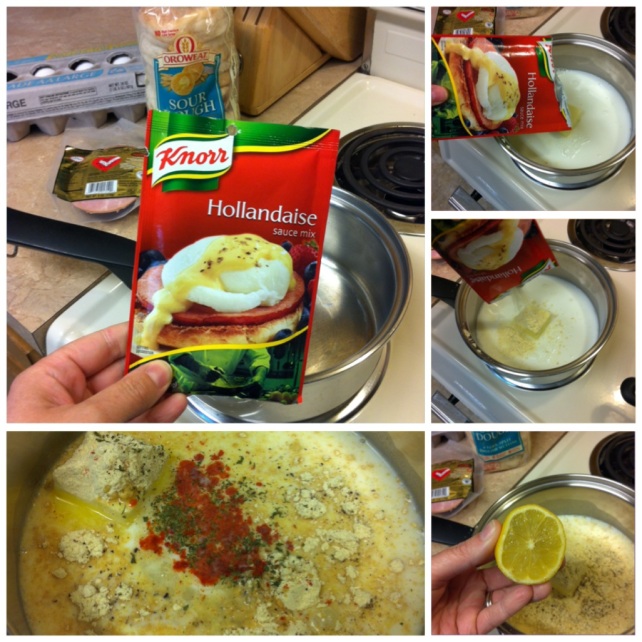
Fresh lemon juice is the key!It livens the sauce, so please use fresh squeezed lemon.
 
What you will need:
1 packet Knorr Hollandaise sauce mix
1 cup milk
3 TBSP butter
1 TBSP fresh squeezed lemon juice
pinch of smoked paprika
pinch of onion powder
pinch of dried parsley OR pinch of fresh minced parsley
8 Canadian bacon slices
2 sourdough English muffins, split in half.
4 eggs
 
Start off by make hollandaise sauce according to packet direction. When combining contents of the packet, milk and butter also add fresh squeezed lemon juice, pepper, onion powder, and smoked paprika. Then whisk until sauce thickens. Turn on low and cover with lid to keep warm

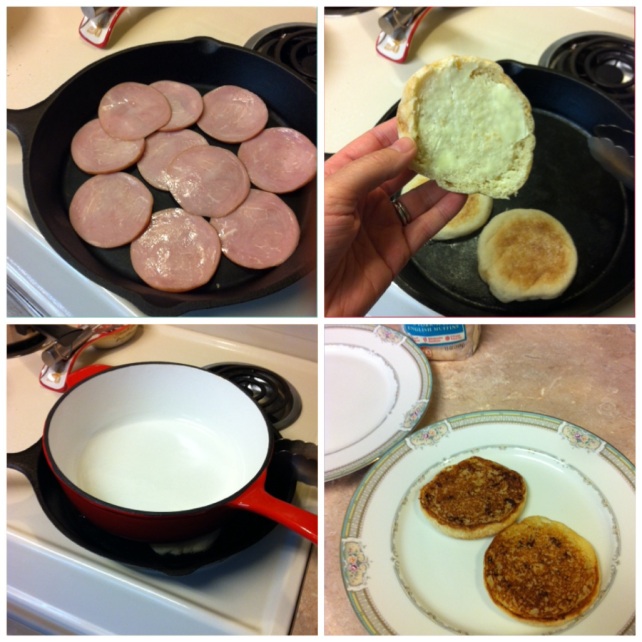
Prep the english muffins, split in half and spread butter on each half. Pre heat a pan, once hot turn temperature to a level 3. Place english muffin butter side down into pan. Place a heavy pan on top of muffins and let cook until brown. It's important to this on a low heat that way you don't burn english muffins. Once cooked, place on plates.
Next make poached eggs and heat up Canadian bacon.

If using poaching pan. Fill pan with a little water and bring to a medium simmer. Once water is at a simmer place dab of butter in each egg poacher. Then crack eggs and place one into each egg holder. Cover with lid and let steam for about 3 minuets or until cooked to your preference.

In the mean time while eggs are poaching in pan, heat Canadian bacon by placing in a preheated pan. Once warm transfer to foil and cover.

Next assembly: Place 2 slices of bacon on english muffin on each half, next egg and top off with hollandaise sauce.

Serve and enjoy!

 
2014-05-11 12.32.12
 
2014-05-11 12.36.092014-05-11 12.38.08
2014-05-11 11.45.39

August 23, 2012

Money savings tip: Make your own olive oil?

What?? That's what I said when I saw a video post from Americas Test Kitchen. It's very complicated....okay, no it's not!! If it was I probably wouldn't do it. Click on this link for ATK video Americas Test Kitchen

Simply just combine  3 parts canola oil & 1 part extra virgin olive oil together and you have your own olive oil. You have both the taste of extra virgin olive oil with the high heat ability of canola oil. Now you don't need to buy 3 separate oils, just buy two and recycle a unused extra virgin olive oil bottle. I call that a money savings tip!

I did not have a funnel, so I made my own. On Pinterest I saw a great idea to use a plastic bottle! So I cut the plastic water bottle in half, and used the top portion as my funnel.

I had about 2/3 cups of Extra Virgin Olive Oil left in my glass bottle. So I measured out 1 & 1/4 cup of canola oil and combined to the EVOO bottle. Not hard! Now I have "olive oil"!


Make your own funnel, use a plastic bottle

Cut plastic bottle in half

you have a funnel!

Cross out the "extra virgin" on your bottle


August 22, 2012

Dont buy bags of frozen rice, freeze it yourself!

Okay, I am not against buying frozen bags of rice, it is very handy to have on hand when I am rushing and need a fast side dish. Occasionally I will buy the frozen bags from Trader Joes. I think the box of 3 bags cost about $3. One bag is about 2 cups of cooked rice and is really only 2/3 servings worth of rice.

I was doing some research and I found some info about freezing rice.  As I was following some directions I still found there were directions that could of been added, so I decided to blog about how to freeze your own rice.

As I am posting this my Little Cupcake is in the kitchen playing with the leftover frozen rice  LOL


One thing I found important is to make sure you use the right size of pot with the amount of rice you are cooking. If you put to much rice in a small pot, I persoanlly find my rice may get more mushy. So I choose a large size pot, or dont cook as much rice at one time. I grabbed my large stock pot for this once I looked at my smaller pot. I am cooking 4 cups of uncooked rice. If your pot is smaller, only cook 2 cups of rice.


Measure out 7 & 1/2 cups of cold water and place in your pot. I normally follow a 2cup of water to one cup of uncooked rice. However I typically under measure my cups and over measure my rice. Therefor that is why I am saying 7 & 1/2 cups instead of 8 cups. This just allows for a proper cooking process, at least this is what works for me. On a high heat boil your 7 & 1/2 cups of water, then once at a boil add the  uncooked rice, butter, olive oil and salt.

7 & 1/2 cups of water
4 cups of uncooked long grain white rice
2 tBs butter (I use salted)
1 tBs of salt
1 tBs of olive oil


I don't have a 6 cup measuring cup, so I just measured out using my one cup and placed in a bowl for proper accuracy. You don't have to do that, that just how I do it.  

After I add the rice I let the water continue to boil for 3 minutes then turn the heat down to low, then stir rice with a spoon, place lid on my pot and turn timer on for 25-30 minutes. After 30 min and  it appears all water has evaporated turn off heat.  Then set timer again for another 30 minutes. One important thing to remember when making rice DO NOT TAKE THE LID OFF OF POT until after the total cooking and wait time. After the 30 minutes you now may lift the lid and let any steam escape for a two minutes. Then take a fork and lightly scrap the rice and fluff. After that its up to you which step you want to go to next. If I dont have time, I  just put the lid back on and leave rice out. I left my rice out for a couple hours. Once I was ready I followed the next step.

 
letting rice boil for 3 min before lid goes on

rice has cooked for 30 min on a low heat, turn off heat and keep covered for another 30 min
rice after 1 hour.

fluff rice with a fork


Take a edged cookie sheet and line with plastic wrap (I used both foil and plastic, I prefer plastic). Then evenly layer out cooked rice onto the cookie sheet. Don't pile high, you want a thin layer. I had to use 2 cookie sheets and I only used half of my cooked rice from my pot.


Place cookie sheet's into freezer. Now I recommend you check on the rice after 30 minutes and mix the rice around, this will keep the rice from freezing into one big log. Do this twice the 1st hour. Then you can leave your rice in the freezer for another 3 hours or overnight like I did.

rice frozen and tossed twice every 30 min

 In the morning I measured out 3 cups of rice and placed in a quart size freezer bag.

place rice in freezer bag and lay flat into freezer

My 4 cups of uncooked rice equaled 17 cups of cooked rice (if I counted correctly). I had 4 freezer quart size bags with 3 cups of rice in each bag, then I had about 5 cups of cooked rice and I placed in a plastic container. That rice is for the rest of the week for side dish or to use in a casserole or make fried rice.

 I had bought a 5lb bag of rice for $3 and I still have a half of bag left...That's a great deal!

When you are ready to use frozen rice. Grab a bag dump it into a microwave safe bowl and microwave for 3 minutes. 


Dont throw away, freeze your onions.


Do you ever find a great deal on a big bag of onions and ask "how can I use them all before they go bad"? Well don't ask yourself that again! During the summer I find this to be more of an issue then during the winter. I tend to cook much less because of the warmer weather. Therefore my large bag of onions continue to sit in my cupboard wasting away. So what to do with those onions? Don't wait until they are no longer usable....freeze them!

I had a 3lb bag of onions that I bought for a $1.50 and only used maybe 3 onions. I had 4 onions leftover that had been sitting in my cupboard for a couple weeks. The older the onion, the more tears and a running nose you will get. I have heard of a trick to wear goggles to help with the tears. But as for me, I just "brave" it out.

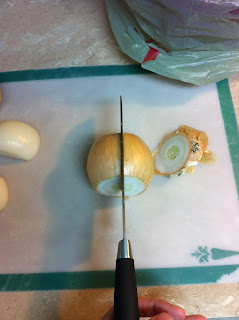
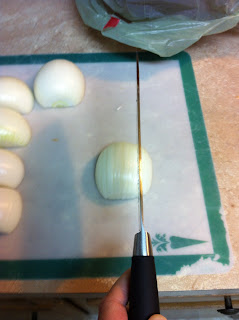
So I took a few pictures on how to cut an onion. Hey some people don't know how! There is no wrong way to cut a onion. This is just the way I like to cut a onion. 

Cut the tips off at both ends, then slice down the middle...but make sure you slice the onion from the tip to bottom, not across. While I slice I like to follow the lines of the onion, it seems to serve as an anchor, sort of. Then I turn the onion and slice in the oppisit directions. You will get even cuts most of the time. Those pesky ends, well I will just lay flat and slice those again.


I choose to cut all my onions in stages. Cut off all the tips 1st, slice in half, then remove the top layer of the skin. Once I finish all my onions, then I start dicing away.

I like to have a bowl, or in my case I used a colander and placed a plastic grocery bag over it for my garbage. It keeps my prep area neat and makes for easy cleanup. Once I am finished, I just take that plastic bag, tie a knot in it and throw the bag in my garbage outside. If I would throw that bag  away in my kitchen garbage, my home would continue to smell like onions  much longer.


Once I finish dicing one onion, I like to place the onions in a bag. I recommend another plastic bag, or a Ziploc bag...not a brown bag, which is what I did this time around. The brown bag gets wet and starts to fall apart. The purpose of the bag? Well to shake the onions up. Great way to get your kiddo involved. Let them shake those onions around to separate them up. Its not a perfect method, and once you dump out of bag, you will still need to break them up a little bit. But don't go crazy!


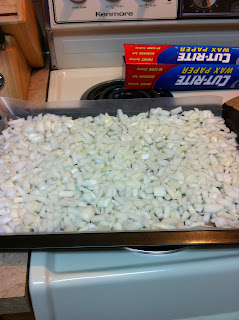
Grab a cookie sheet that has edges and layer the bottom with plastic wrap. I have used wax paper, and aluminum foil, I think plastic wrap is the best. Spread your onions evenly into the bottom of cookie sheet and place into freezer. I would recommend at least one to two hours.


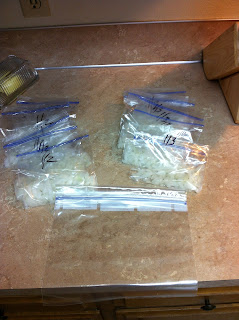
Once the onions feel frozen, you will need to move fast during this next step. Grab some sealable sandwich bags and  1 large gallon freezer bag. I choose to break up my onion into 1/3 and 1/2 cup portions. A 1/3 cup of diced onion equals half of a medium onion roughly. And a 1/2 cup portion equals one whole small onion or half of a large onion roughly. I marked each of the sandwich bags w/ the measurement using a permanent marker. I placed the sandwich bags into my freezer a couple at a time to keep onion from defrosting to much. Once I was done measuring all the onions out, I grab the bags from the freezer and I laid the bags flat and placed into the gallon size freezer bag. Then place bag into freezer and use when you need them.


 I used 4 medium to large size onions and I was able to get 6 bags of 1/3 cups of onions and 6 1/2 cups of onions.

I love to use fresh onions, however these onions are great to have on hand for anything! Plus it is a great money saving tip so you don't waste food. It also makes for a faster process prepping your food.  My one tip for cooking with frozen onions, is  if you are browning chicken in the same pan with the frozen onions, it will steam your chicken or any meat you may use. So make sure that any water that comes from the onions is dissolved before you place any meat in the pan. Or brown your meat 1st then place onions in pan.

Interestingly my Little Cupcake wanted to eat the raw onions....she thought it was a snack LOL